I’m building a site for a Japanese company. They need a Gravity Forms address field with a different order. I spent a BOATLOAD of time trying to get this working and I finally did. Here’s some details.
Extending Address Field
I started by extending the address field. Simple enough. Made some tweaks to the get_field_input() function to reorganize. Made sure all other functions that used the .1, .2, etc. id’s for the inputs inside the field were updated in my field class.
After some trial and error with those I got the form field to be in the admin so I could add it to a form. Awesome! Went to the front and there’s my new beautiful field. But no matter how hard I tried it would not save any of the data.
I searched and searched through all the hooks I could find related to this. I almost gave up but then I found a comment that said something about default inputs were loaded in js.php file.
JS.PHP
In the root directory of Gravity Forms is a file named js.php. This file runs a switch case on different field types and populates some data. If you look towards the bottom around line 838 at the writing of this post you will see:
Right there you need to hook in your own default settings with field.inputs defined. That’s about it! I just copied the info they had for the address field, tweaked it to match my class’s data and voila.
I’ve just released the latest version of my plugin to the WordPress repo. You can now simply click a button to have a plain text version of the information copied to your clip board. Paste into an email or support forum with ease and no crazy html or code getting included.
My previous post about Give was an intro to building a payment gateway for the plugin. If you’ve built extensions for Give or are starting to then you’ve probably run into the settings fields API for adding a variety of inputs. The options are limited and there are often times a need for custom fields.
How Give’s Settings Fields Work
In the class file class-admin-settings.php located in give/includes/admin/ the function output_fields handles displaying different types of fields registered. If you are here you probably know the standard format for adding a settings field in your code:
As you add settings to an array they will be displayed in the same order in a Give formatted html table. It appears they were using CMB2 but have since deprecated it. I’m not 100% sure but there are remnants of it in the plugin.
Creating A Custom Field
Within the output_fields function I mentioned above there is a switch statement on the field type. This goes through all the type options default in Give and outputs the field content based on type. After all the case type options the default is a sweet do_action( ‘give_admin_field_’ . $value[‘type’], $value, $option_value ); This is how you do what you want to do with a custom field.
One thing I really needed when building an extension was a way to have inter-woven sub headers for form options. I could not find a way to just output a title. The type field title that’s default to Give outputs the top of a table with it as it’s meant to be, that’s right, at the top lol.
Let’s start with an example of creating a simple sub title output.
Remember, the form settings fields are all in a table so you need to use a table row to output your field. Now we can add this subtitle between fields by using:
Voila! We have a custom field in Give settings. The type is set to what comes after give_admin_field_ in the add_action of our sample.
Here I have two custom fields, a subheader field and a horizontal rule field
Saving Custom Field Data
Saving is pretty straight forward as well. The example below is kind of pointless as Give already has a text box type but it shows how you’d go about saving your data in a custom field.
The key is figuring out how to structure your action’s name. Give uses the settings page followed by _save_ followed by the tab you are on. Here’s their documentation on it followed by an example.
/**
 * Trigger Action.
 *
 * Note: action dynamically fire on basis of setting page slug and current tab.
 * For example: if you register a setting page with give-settings menu slug and general current tab name
 *              then action will be give-settings_save_general
 *
 * @since 1.8
 */
do_action( self::$setting_filter_prefix . '_save_' . $current_tab );
I’m not even going to link to the blog post they put up recently, but I’m sure you can find it if you want.
So a dude bought some plugins and in those plugins snuck some links/urls to spam sites he owns. Yes, it’s shady and awful practice. Is it illegal? No. Is it ok to call out the plugins so people ditch them? Absolutely.
But is it cool to post their full name a bunch of personal information and photos? FUCK NO. That is entirely uncalled for and fucked up.
This guy isn’t pushing malware. He’s not hacking your mainframe, bro. He’s doing some sleezy back linking shit. There is not a single thing about that which makes it appropriate for WF to put screen grabs of his LinkedIn profile on their post.
Wordfence is starting a witch hunt. I remember when those got banned on Reddit and you know why? Because it’s wrong. It can quickly escalate to mass harassment or worse. You don’t put up other people’s personal information on the web. Period.
I am absolutely flabbergasted that they had the gaul to put up a blog post like that.
I decided to learn Swift. I’ve always wanted to do some 3D game coding but have never taken the initiative learn a language that’s good for that. I’ve had some time in the evenings free up recently and took advantage.
Now I’m still learning Swift. I’ve only been messing with it for two weeks. My whole goal since starting has been to make a bimini ring toss game. If you’ve never heard of it, it’s popular in craft beer pubs. There’s a metal ring that hangs from the ceiling on a string. You pull the ring back and try to land it onto a hook on the wall.
SCNNode Shapes
There’s a few basic shapes provided in SceneKit that you can use to start building. I used a SCNTorus for the ring.
Like I said, I’m still learning, but here’s the gist of my understanding. SCNNodes are the visible objects you can manipulate in the 3D world. You add them to an SCNScene which is the world your 3D app lives in.
You can’t see the SCNNodes you add until they have shape so you need to build an SCNGeometry and add it to your SCNNode. The geometry can be built easily using some pre-built shapes like SCNTorus or SCNBox and a few sizing parameters.
Your nodes aren’t going to do much either until you add a SCNPhysicsBody to them. I’m still trying to wrap my head around the physics stuff but I get the basics which is all you need to build something like this rope. By making a physics body object and using .dynamic for type and nil for shape it just defaults physics boundaries to the shape of the node and interacts with other nodes that have physics bodies.
Faking A String
So googling “Swift 3D string” didn’t help me at all. Seeing as string is a global keyword for nearly every coding language, there were no results about an actual twine string being created in 3D.
I started looking for “rope” and found one codebase in c# that built a rope by chaining a bunch of cylinders together that had pivot joints connecting them. Made sense!
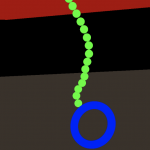
I want to learn Swift though, this meant I needed to build this functionality myself but at least I had a reference now. Let’s start by picking our shape. Since I wanted more of a string than a rope I went with spheres. The code example here has them bigger than they will be when the game is ready but it’s good for getting the functionality built.
I put this into a class. The full repo for this project can be downloaded and run in xcode 8 or newer. I create what I call links in the rope. I start with my base link called rope on init since it will be the main point of the whole object. Then I have a function for creating link nodes.
It’s important to note I’m using a radius of 0.1. I’m still not completely comfortable with these units, I’m trying to figure them out, but relatively they make sense.
Next, in the game’s main view controller I generate my rope and all the links in a loop and store them in an array called links. I do this because I wanted to add all my nodes to the scene in the same block of code. It’s not required to do that but I like the organization.
The SCNPhysicsBallSocketJoint class took me the longest to find and learn it’s what I need to connect all these pieces together. Implementing it correctly took me some time but the logic makes sense when you really think about it.
Coordinates in SceneKit
Your SCNScene object has coordinates for specific points in x, y and z format. x = horizontal line, y = vertical line and z = depth (near/far) line. Now your SCNNode’s ALSO have x, y and z coordinates for points on the actual node. This can get confusing so take your time getting positioning of objects correct.
For the objects, we don’t need to set a position. Everything will be spawned at 0, 0, 0 which is right in the middle. You should add a SCNFloor that’s got a -y position so when gravity turns on your objects don’t just drop down into nothingness.
SCNPhysicsBallSocketJoint requires two SCNNode’s passed to it and it needs a x,y,z point on each node to connect them together. So bodyA is our link and bodyB is the previous link created in the loop. Using an SCNVector3 object we build the x,y,z coordinates.
When nodes are created they default to having the coordinates 0,0,0 right in the middle of the object. Remember our spheres are 0.1 radius. That means we want out point of connection to be on the top of one sphere and bottom of the other. So we usr -0.05 on one link and 0.05 on the other link for x, y and z. Now that I think about it a radius is half the width of our sphere so this number should be 0.1 but 0.05 works so maybe I’m wrong about where the default point is. Needless to say, you will have to do some math and toy with these numbers.
When you build your joint you have to add it to the SCNScene as a behavior using the addBehavior() method.
Dive In
Finally, we add all of these items to the SCNScene as children and we are set. They all need to be child nodes of the same parent node, I use on called Holder that I created. It’s an empty node with no geography so you can’t see it, it’s just like a container to keep them all related to each other.
Check out the full repo and toy with it if you want. You can see that I have a ring object I attach to the end for my bimini game. I toy with mass on some nodes as I think that helps the ring feel heavier in the game world. I have a ceiling for attaching the rope and so on.
Did you get the below email after trying to submit your NativeScript iOS app to iTunes Connect?
Dear developer,
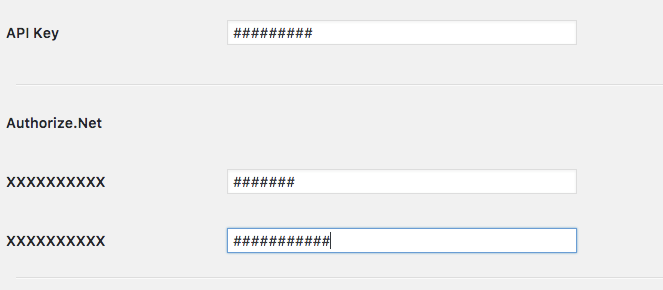
We have discovered one or more issues with your recent delivery for “#####”. To process your delivery, the following issues must be corrected:
This bundle is invalid – The Info.plist file is missing or could not be parsed. Please check it for embedded control characters.
Once these issues have been corrected, you can then redeliver the corrected binary.
Regards,
The App Store team
It can be really irritating but the fix is pretty simple. This happens when odd characters or weird adjustments are made dynamically to the plist.info file attached to your bundle. To get rid of this annoying rejection you should do a few things.
Make sure you are setting as much info as you can manually in your app/App_Resources/iOS/info.plist file. This file is used to generate the xcode.project file’s included plist. Avoid adjusting the generated plist.info file as much as possible and do this pre-emptively before each build including updating your CFBundleShortVersionString and CFBundleVersion keys to latest version.
Now runs tns platform remove ios then re-add with tns platform add ios
Finally run tns prepare ios
You should be good to go and no more rejection (for that at least)!
I have a lot to say about mentors. I would not be where I am today without them. I didn’t even realize they were mentors until after the fact. I remember being in my late teens and early 20’s and people would mention finding a mentor. I never looked for one, I thought the whole concept was strange. Like, what’s the difference in a teacher and a mentor?
But at the ripe age of 33 I know the difference. A mentor is a lot like a teacher but they take it a big step further, a really big step. They take an interest in seeing you better yourself. Not a light “I want to see you do good” interest, but a deep caring in you getting something out of what you are after.
Teacher’s also teach people who really don’t care about the subject. To get a mentor you have to be passionate about the subject matter. So I’m starting this series with Richard. I’m going to leave last names and identifying details out of the articles unless I’m given explicit permission to use their full names.
Getting Into Web Development
When I was 21 I got married and moved to Germany with my military wife. She worked a lot and worked really hard. Her income was guaranteed and I needed to provide as well. I’d made money building websites and I wanted to try and do it full time but this meant finding clients.
Before I moved over seas I was living in Asheville, NC and had listed myself on a couple freelancer websites. I showed up in searches for Asheville web developers. I got an email from Richard Earls shortly after I got to Germany.
Richard was contracting for a large organization that provides services for travel agents (I think that’s what they did at least). He wanted a Macromedia Flash application that was pretty neat on paper. It was kind of like a forum but the UI looked like a computer Desktop and all the forms were represented by icons that could be moved around and sorted. If you double click on one it works like a folder and opens a window with sub forums and so on.
Also, there was an entire custom CMS that managed all the forums and users. It was wildly complex and I was a terrible coder.
When you double clicked a forum there were topics and you could create, comment, reply and more. I had never built anything even CLOSE to this complex but I told Richard on our first phone call, “Yea, I can totally do that.” The cold sweat set in but I charged at the project and built it. Kind of.
First Project
I believe we said $6,000 for the project. I got $3k down and the other was to be paid on delivery. I built the system but as the project moved along the scope started changing. I didn’t know what scope was back then so I just went with it. I built something really freaking cool but my code was spaghetti. Anything Richard found wrong I’d patch with more spaghetti and when things didn’t work I blamed it on anything other than my own skills.
Richard and I had a very intense phone call one night. I remember it pretty clearly: Where I was standing, what was going on in my head, the fear of saying “no” and “pay me.” In the end I got paid, I don’t think the project ever went live anywhere though. I figured that was going to be the end of my relationship with Richard but I was way wrong.
Growing A Relationship
Richard gave me more work. I’m not sure why but if I were to take a guess it would be communication. My father was a preacher and public speaker and I definitely got some of that from him. I take pride in my communication skills and I find that getting clients is a lot easier when you can have a good conversation.
I flew back to the states two times for my last two college semesters. When I got to Asheville the first time Richard and I got together in person at his condo. He sketched out on paper his concept for a website. He called it TravelResearchOnline.com (TRO). We spent some time going over it, throwing out ideas and how to turn it into a business.
I dove in on the project and Richard paid me by the hour (I charged $17/hr). One day we launched TRO. It was damn exciting for me and Richard hit the floor running getting traffic and sponsors. Richard still runs that website today, over a decade later as one of his main sources of revenue.
I messed up often. I wrote hacky code but I always managed to make things work. Bugs happened, things broke and Richard always gave me a kind nudge to get shit working again. He was firm often but never angry like our first project when things hit the fan.
A Mentor
What made Richard a mentor? Richard looked out for me. He paid me often, if I needed advance payment for future work he didn’t bat an eye. He pushed me to do more and be better. He constantly checked on me personally and even shared things happening in his personal life.
He was a friend.
And he still is. I posted on Facebook recently about needing some advice on some personal stuff and he hit me up right away in chat and told me to call him. I grew a lot all while working for Richard almost daily.
I’m estimating years here but I’d some from around the age of 21 to 27 I worked for Richard constantly. We built a ton of cool projects.
I remember in 2009 when I was in grad school at Syracuse and we were building this flash based digital travel expo. It was a really awesome concept we brought to life. But I was sitting in Media Law class and got a text from Richard in all caps. Something along the lines of “TRO TRAVEL EXPO IS DOWN!” and this was a couple hours after we launched. It was getting crazy amounts of traffic and I knew nothing about coding for performance or server setups yet I was setting up $225/month dedicated servers for him at SoftLayer.
Even after that Richard never stopped giving me work or being a friend. And that’s Richard Earls: Travel junkie, Thinker, Business Man, Friend and Mentor.
I got a job as the Webmaster for Sarasota Memorial Hospital when I finished grad school in the Summer of 2009. I still freelanced for Richard for a couple years but slowly I trickled away from any freelance. And around 2010/11 I wrote my last lines of code for him. I can look back on that period of my life and see clearly how it was a big part of molding who I am today.